
前回の記事はBlenderで簡単な飛行機をつくってエクスポートした。エクスポートしたファイルをUnityにドラッグ&ドロップしhierarkhy上に配置した。
Blenderで作った飛行機をUnityで飛ばす①飛行機をエクスポート
Unityで飛行機を簡単にとばすにはどうしたらいい?
Unityで飛行機を簡単にどばすには、有料のアセットを使うのが一番簡単かと思いますが、実はStandardAssetsの中にある、AeroplaneUserControlというスクリプトを使えば飛行機オブジェクトをとばすことができます。StandardAssetsはAssetStoreからダウンロードする必要があります。まだダウンロードしていなければしておくとよいでしょう。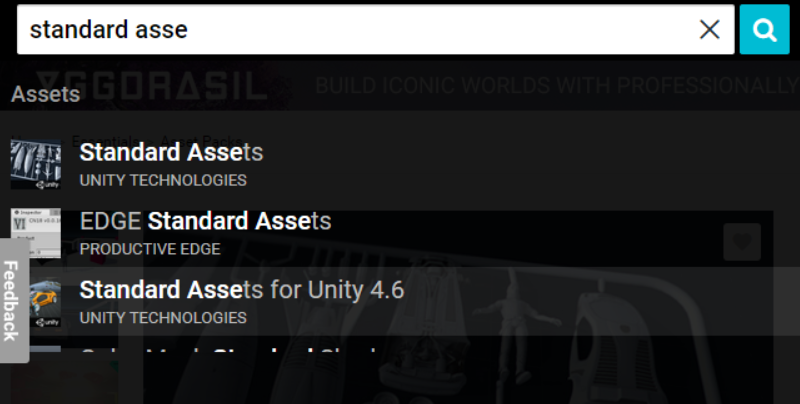
StandarAssetsをimportするとUnityのプロジェクトにフォルダが作成されます。
AeroplaneUserControlを飛行機オブジェクトにアタッチする
AeroplaneUserControlスクリプトはじつは2種類ありますが、今回はAeroplaneUserControl 4 Axisを使います。飛行機オブジェクトを選択してAddComponentの検索欄にuserと入力します。するとAeroplaneUserControl 4 Axisが現れるのでこれを選択して追加します。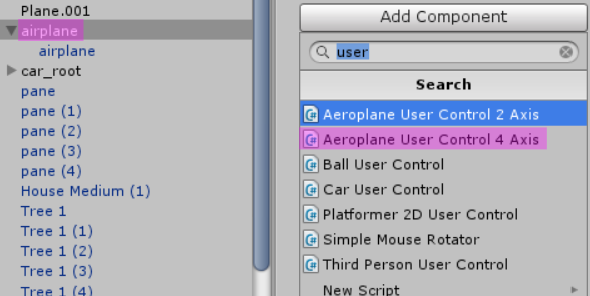
飛行スクリプトを改造する
AeroplaneUserControl 4 Axisは飛行スクリプトですが、こちらは旋回やピッチの操作にマウスを使っており、とてもじゃないですがまともに操作できるものではありません。もとのコードはコメントアウトにして、q,w,e,rキーで旋回とピッチ操作できるようにしたものがこちらのコードです。
using System;
using UnityEngine;
using UnityStandardAssets.CrossPlatformInput;

namespace UnityStandardAssets.Vehicles.Aeroplane
{
    [RequireComponent(typeof (AeroplaneController))]
    public class AeroplaneUserControl4Axis : MonoBehaviour
    {
        // these max angles are only used on mobile, due to the way pitch and roll input are handled
        public float maxRollAngle = 80;
        public float maxPitchAngle = 80;

        // reference to the aeroplane that we're controlling
        private AeroplaneController m_Aeroplane;
        private float m_Throttle;
        private bool m_AirBrakes;
        private float m_Yaw;


        private void Awake()
        {
            // Set up the reference to the aeroplane controller.
            m_Aeroplane = GetComponent<AeroplaneController>();
        }


        private void FixedUpdate()
        {
          // Read input for the pitch, yaw, roll and throttle of the aeroplane.
          // float roll = CrossPlatformInputManager.GetAxis("Mouse X");
          // float pitch = CrossPlatformInputManager.GetAxis("Mouse Y");
            float roll;
            float pitch;
            if (Input.GetKey("w")) {
              pitch = 0.1f;
            }else{
              pitch = 0.0f;
              if (Input.GetKey("q")) {
                pitch = -0.1f;
              }
            }
            if (Input.GetKey("r")) {
              roll = 0.1f;
            }else{
              roll = 0.0f;
              if (Input.GetKey("e")) {
                roll = -0.1f;
              }
            }
            m_AirBrakes = CrossPlatformInputManager.GetButton("Fire1");
            m_Yaw = CrossPlatformInputManager.GetAxis("Horizontal");
            m_Throttle = CrossPlatformInputManager.GetAxis("Vertical");
#if MOBILE_INPUT
        AdjustInputForMobileControls(ref roll, ref pitch, ref m_Throttle);
#endif
            // Pass the input to the aeroplane
            m_Aeroplane.Move(roll, pitch, m_Yaw, m_Throttle, m_AirBrakes);
        }


        private void AdjustInputForMobileControls(ref float roll, ref float pitch, ref float throttle)
        {
            // because mobile tilt is used for roll and pitch, we help out by
            // assuming that a centered level device means the user
            // wants to fly straight and level!

            // this means on mobile, the input represents the *desired* roll angle of the aeroplane,
            // and the roll input is calculated to achieve that.
            // whereas on non-mobile, the input directly controls the roll of the aeroplane.

            float intendedRollAngle = roll*maxRollAngle*Mathf.Deg2Rad;
            float intendedPitchAngle = pitch*maxPitchAngle*Mathf.Deg2Rad;
            roll = Mathf.Clamp((intendedRollAngle - m_Aeroplane.RollAngle), -1, 1);
            pitch = Mathf.Clamp((intendedPitchAngle - m_Aeroplane.PitchAngle), -1, 1);
        }
    }
}
| q | 機首を上に向ける |
|---|---|
| w | 機首を下に向ける |
| e | 左に旋回 |
| r | 右に旋回 |
| ↑↓キー | 加速と減速 |
| ←→キー | 方向転換 |
飛行機オブジェクトのカメラ追尾はどうする?
簡単にカメラ追尾させる方法は2種類ありますが、今回はMultipurposeCameraRigのAutoCamを使いました。カメラを追尾させる方法についてはこちらの記事でも詳しく解説しています。
Unityでカメラを自動追尾させる2つの方法。
飛行スクリプトのパラメーターの調整
飛行機オブジェクトにAeroplaneUserControl4Axisコンポーネントを追加するとRigidBodyコンポーネントも自動で追加されます。RigidBodyのmassというパラメーターは飛行機の重量です。これが重すぎると加速しようとしてもオブジェクトが落下する一方になります。ここの値は自分で作った飛行機オブジェクトの大きさにあわせて調整していく必要があるでしょう。
Blenderで作った飛行機オブジェクトをUnityで飛ばす動画をみる
Blenderで作った飛行機オブジェクトをUnity上で飛ばすことができました。操作方法にクセはありますが、慣れると以外に爽快です。設定方法などよくわからない部分もあると思いますので動画にしておきます。
追記20181228
コライダーを飛行機につけると動きがおかしくなったので、結局この記事で作った飛行機は未完成になります。
コメント